How to install a Nest thermostat
The Nest thermostat is a smart thermostat developed by Nest Labs, a subsidiary of Google. It offers advanced features and capabilities to help you efficiently control the heating and cooling of your home.
Congratulations on your purchase of a Nest thermostat, specifically the latest generation known as the “Google Nest Learning Thermostat.” This smart thermostat is highly regarded and a fantastic addition to any smart home setup.
Setting up your Nest thermostat is a breeze and doesn’t require the assistance of an electrician. In this article, we will guide you through the step-by-step process of installing your Nest thermostat. However, before making the purchase, following the instructions outlined below is essential to ensure compatibility with your heating and cooling system. This preliminary step will ensure a seamless installation and optimal performance of your Nest thermostat.
Getting Started : How to install a Nest thermostat
- Gather Everything You Need: Before starting the thermostat installation, make sure you have the necessary tools such as a screwdriver, drill (if required), and the Nest thermostat itself.
- Turn Off Power: Locate the breaker that controls your heating and cooling system and switch it off to ensure safety during installation.
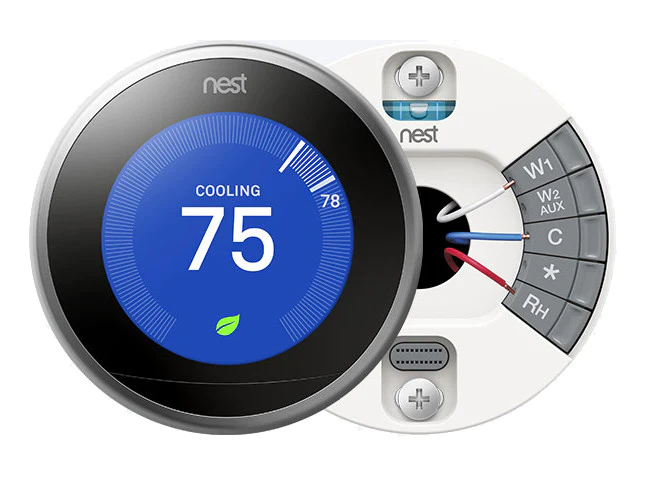
- Remove the Old Thermostat: Take off the faceplate of your current thermostat and disconnect the wires from the terminals. Take a picture or make a note of the wiring configuration for reference.
- Mount the Nest Base Plate: Attach the Nest base plate to the wall using the provided screws and a screwdriver. Ensure the base plate is level and securely mounted.
- Connect the Wires: Match the wires from your HVAC system to the corresponding terminals on the Nest base plate. Use the wiring diagram or the Nest app’s compatibility checker for guidance. Insert each wire into the appropriate connector and press until it clicks into place.
- Attach the Nest Thermostat: Align the Nest thermostat with the base plate and press it firmly until it snaps into place.
- Connect to Power: Turn the breaker back on to restore power to your heating and cooling system.
- Set Up and Configure: Follow the instructions on the Nest app to connect the thermostat to your Wi-Fi network, create a Nest account, and configure your desired temperature settings.
- Enjoy Your Nest Thermostat: You can start using your Nest thermostat once the setup is complete. Adjust the temperature manually or take advantage of the Nest’s learning capabilities and smart features.
Remember, it’s important to refer to the specific installation instructions provided by Nest for your model of a thermostat, as steps may vary slightly. Additionally, seeking professional assistance is recommended if you’re uncomfortable with the installation process or unsure about any step.
Complete Setup With the Nest App
Completing the setup of your Nest thermostat using the Nest app is a straightforward process. Follow these steps:
- Download the Nest App: Install the Nest app on your mobile device or tablet. The app is available for iOS and Android platforms. Open the app and sign in with your Nest account or create a new one if you don’t have an account yet.
- Add a Product: Tap on the “+” symbol in the app to add a new device. Select “Thermostat” from the list of available Nest products.
- Scan the QR Code: Use your device’s camera to scan the QR code on your Nest thermostat’s back. This will link your thermostat to your Nest account.
- Follow the On-Screen Prompts: The Nest app will guide you through the setup process step by step. Provide the necessary information, such as your home’s zip code, Wi-Fi network details, and other preferences as prompted.
- Connect to Wi-Fi: Ensure your mobile device or tablet is connected to the same Wi-Fi network that you want your Nest thermostat to connect to. The app will help you establish the connection between your thermostat and your Wi-Fi network.
- Confirm Wiring Configuration: The app will display a wiring diagram based on the information you provided during setup. Verify that the displayed configuration matches the wiring connections you made during installation.
- Test the System: The Nest app will initiate a test to check if your heating and cooling system is functioning properly. Follow the instructions to run the test and confirm that everything is working as expected.
- Customize Settings: Once the setup is complete, you can customize various settings, such as temperature preferences, scheduling, and energy-saving features, within the Nest app. Adjust these settings to fit your lifestyle and desired comfort levels.
By following these steps and using the Nest app, you can easily complete the setup of your Nest thermostat and start enjoying its smart features and energy-saving capabilities.

