What Does the Capacitor Do in an AC Unit? A Homeowner’s Guide
Learning what does the capacitor do in an ac unit can save you from a major cooling emergency when the summer heat peaks. This tiny, cylindrical electrical component plays an indispensable role in powering your central cooling system’s heavy-duty motors. When it malfunctions, your entire air conditioner will instantly grind to a halt, leaving your home hot and uncomfortable. Understanding how this vital part works helps you identify common electrical issues early, protect your expensive cooling hardware, and make informed maintenance decisions.
What is an AC capacitor?
The Electrical Reservoir of Your System
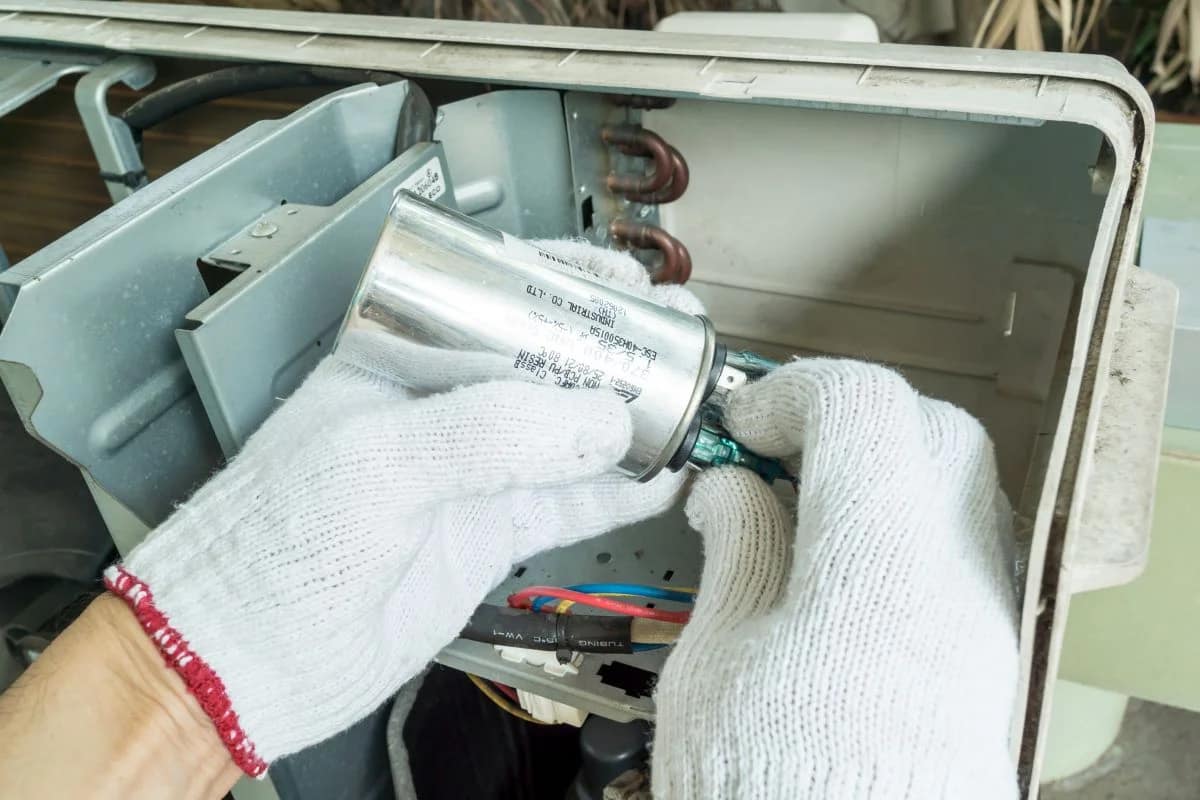
An air conditioner capacitor is a small, cylindrical device shaped like a large metal can that is housed inside the electrical service panel of your outdoor condenser unit. It functions essentially as a temporary, short-term storage battery for electrical energy. It collects electrical voltage from your home’s power lines and stores it up, ready to be released in high-volume bursts whenever your cooling equipment cycles on.
What Does the Capacitor Do in an AC Unit
The Primary Function Behind the Power Surge
When asking what does the capacitor do in an ac unit, the simplest answer is that it provides the massive electrical boost required to jumpstart the heavy motors. The standard electrical supply coming from a residential wall outlet does not possess enough initial torque to physically force the large outdoor compressor and condenser fan motors to spin from a dead stop. The capacitor solves this problem by discharging its stored energy in one giant, concentrated burst, giving the motors the necessary momentum to jump into action.
Maintaining Continuous Operational Stability
Beyond providing the initial kick to start the system, this component remains active throughout the entire cooling cycle. If you have ever wondered about an ac capacitor what does it do once the machine is already running, its secondary job is to provide continuous, steady voltage regulation. It smooths out any minor electrical fluctuations in the incoming power lines, ensuring that your compressor and fan motors rotate at a constant, highly efficient speed without overheating or stalling out during periods of high grid demand.
What Causes AC Capacitor Failure?
Environmental Stress and Heat Exposure
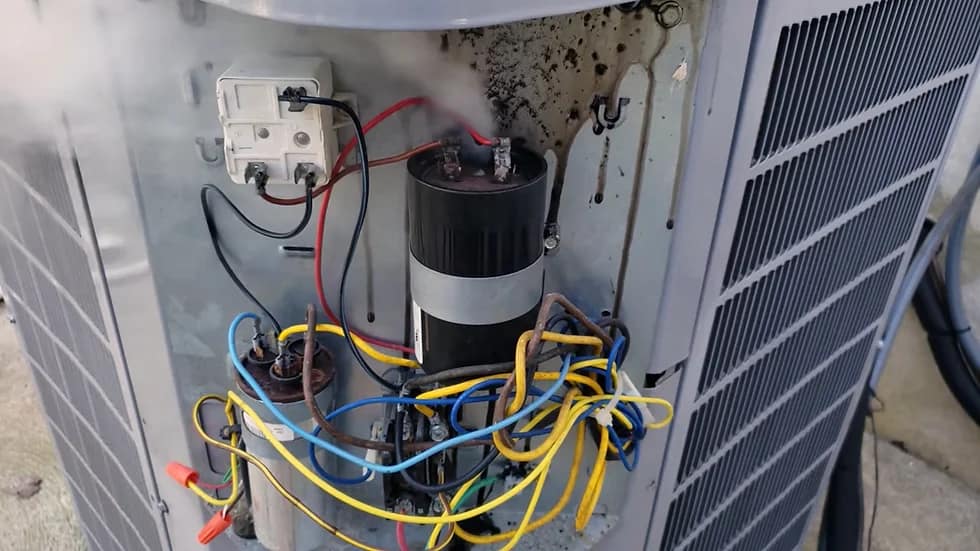
As an electrical component, a capacitor is highly sensitive to extreme environmental conditions. Because it is located inside the unconditioned outdoor metal cabinetry, it is routinely exposed to intense summer heat waves. Prolonged exposure to high operational temperatures causes the internal fluid chemicals to expand, degrade, and eventually leak out, destroying the part’s ability to hold an electrical charge.
Electrical Overloads and Lack of Maintenance
Component Wear and Tear: When dirt blocks your system’s airflow, the motors must work significantly harder, drawing more power and putting immense strain on the electrical circuits. Keeping your system clear of debris is a great preventative step. Learning how to clean your central air unit inside helps maintain the proper airflow balance that keeps these electrical parts running smoothly.
Power Surges: Sudden voltage spikes from lightning strikes, grid blackouts, or local transformer failures can instantly fry the delicate internal circuitry.

5 Signs You Need an Air Conditioner Capacitor Replacement
Identifying Electrical Warning Signals
Recognizing the early symptoms of a failing electrical component protects your system from experiencing a total mechanical breakdown. If you notice any of these five red flags, your system is likely struggling with a dying capacitor:
- The Dreaded Humming Noise: If you hear your outdoor unit making a loud, continuous buzzing or humming sound but the fan or compressor won’t turn on, the motor is trying to start but lacks the torque.
- Delayed or Sluggish Starts: The system takes an uncomfortably long time to kick on after receiving a cooling command from the thermostat.
- Random System Shutoffs: The air conditioner turns itself off abruptly in the middle of a cooling cycle before matching your indoor settings.
- Warm Air from the Vents: The indoor fan blows air, but the outdoor compressor fails to start, resulting in a House Air Conditioner Not Cooling the property.
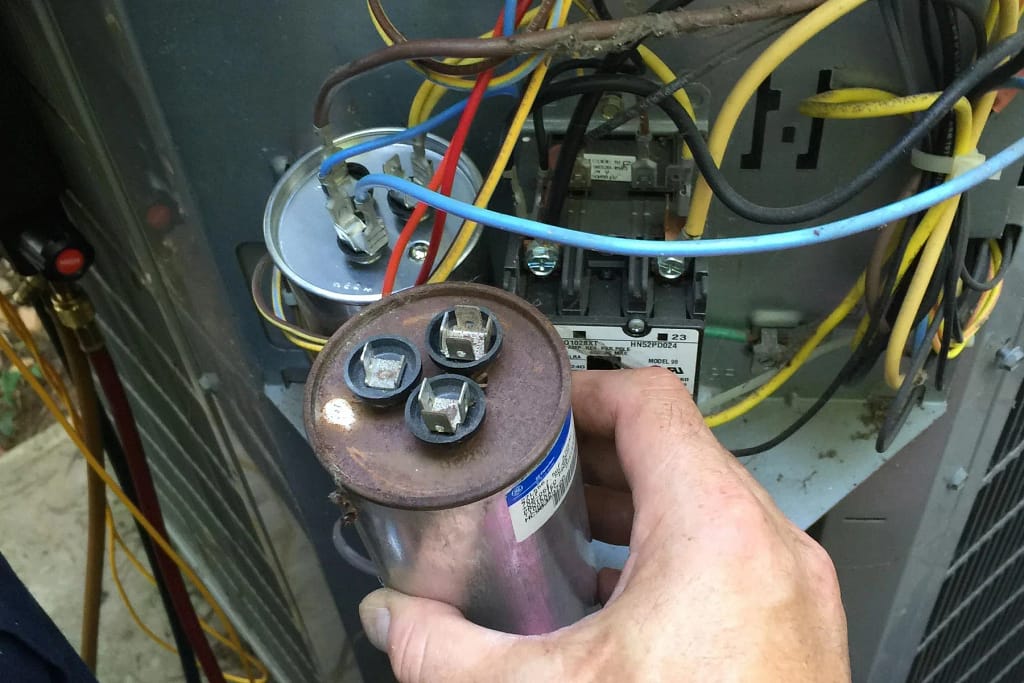
- The Physical “Mushroom” Top: A visibly bulging, swollen, or leaking top on the metal canister is an absolute sign of physical failure.
How To Check a Capacitor
Testing Electrical Performance Safely
To accurately determine if your component has officially failed, a professional technician will look for visual damage and use precise diagnostics. First, they will inspect the top of the metal canister to see if it is perfectly flat or dangerously warped. If the top is bulging upward like a mushroom or leaking oil, it is completely dead and must be replaced immediately.
Using a Digital Multimeter
If there is no obvious physical distortion, a technician will use a digital multimeter set to capacitance mode to measure the component’s true microfarad ($\mu\text{F}$) rating. After turning off all power and safely discharging the stored voltage, they connect the meter leads to the terminal posts. If the readout drops more than 5% to 10% below the factory specification printed on the side of the canister, the part lacks the electrical strength to operate your system safely.
Step-by-Step Air Conditioner Replacement Guide
Executing a Safe Mechanical Swapping Process
Because high-voltage components retain dangerous amounts of electricity even after the power is turned off, a professional technician follows a strict safety sequence when performing an AC repair service to replace a bad capacitor.
Disconnecting the Power Sources
The technician will shut off the main electrical power at the outdoor disconnect box and flip the indoor HVAC circuit breakers. They will then remove the access panel and use an insulated screwdriver to short across the terminal posts, safely discharging any lethal residual electricity stored inside the device.
Labeling and Transferring the Wires
The technician will carefully document or photograph the wiring configuration. They then disconnect the wires from the old terminals—labeled “Herm” for the compressor, “Fan” for the fan motor, and “C” for the common wire—unbolt the old mounting strap, secure the brand-new matching unit in place, and attach the wires to the corresponding terminal pins precisely.
AC Capacitor Replacement Cost Breakdown
| Cost Component | Price Range (Texas Average) | Details |
| Diagnostic Service Call | $70 – $150 | A flat fee charged by local techs to test the system and confirm the capacitor has failed. Many companies waive this if you move forward with the repair. |
| The Part (Capacitor Only) | $10 – $50 | Standard wholesale/retail cost depending on whether it is a single-run, start, or dual-run capacitor (which controls both the compressor and the fan). |
| Professional Labor & Installation | $120 – $300 | The cost for a licensed technician to safely discharge the old high-voltage electricity, install the new part, and verify proper amp draw. |
| Emergency / After-Hours Fee | Add $100 – $200 | It’s common in Texas if your AC goes out on a weekend, holiday, or during a 100°F+ heatwave. |
| Total Professional Job (Standard) | $200 – $450 | The typical all-inclusive flat-rate price range you will see on a standard weekday service ticket. |
Common Types of AC Capacitors
The Dual Run vs. Single Run Breakdown
Residential air conditioning systems utilize two primary configurations of capacitors depending on the specific equipment design. Understanding these variations helps ensure you select the exact match for your hardware.
Dual-Run Capacitors
This is the most common type found in modern residential outdoor units. A dual run unit combines two distinct capacitors inside a single metal canister. It features three terminal posts on top and is responsible for supporting both the outdoor compressor motor and the condenser fan motor simultaneously, saving physical space inside the electrical panel.
Start Capacitors
Some older or heavy-duty systems use a dedicated start capacitor alongside a run capacitor. This component provides an extra-large injection of electrical torque to get the compressor moving quickly, then immediately disconnects itself from the circuit via a relay within a fraction of a second once the motor reaches 75% of its full running speed.
Extend the Lifespan of Your Capacitor for an AC Unit
Proactive Steps to Prevent Electrical Wear
While electrical components have a natural lifespan, routine preventative habits can protect them from burning out prematurely. Keeping your system running cleanly prevents the electrical resistance that degrades active circuits.
Maintain Your Indoor Climate Controls
If your system experiences communication errors, it can cause the outdoor components to cycle on and off rapidly. This short-cycling places immense repetitive strain on your electrical relays. If you ever find your air conditioner and thermostat not working in harmony, resolve the issue immediately to protect your outdoor components from this destructive cycling behavior.
Address Internal Fluid Leaks Early
Low refrigerant levels force your compressor to run longer, hotter cycles to cool your home, heating up the entire electrical panel. Keeping your refrigerant levels balanced protects your electrical components from thermal stress. If you suspect a system leak, finding out the cost to repair leaking ac unit components early will protect your capacitors from failing due to systemic overheating.
Why Trust 24sevenac Professionals for Your HVAC Capacitor Fix?
When your system won’t turn on, dealing with high-voltage HVAC components requires specialized training, diagnostic tools, and strict safety equipment. Our professional team brings transparent flat-rate pricing, certified expertise, and rapid response times directly to your doorstep. We diagnose your electrical faults accurately, ensuring your system receives the exact component match it needs to operate safely and efficiently. Let us take the guesswork out of your repairs and restore your home’s cool air—contact us today to get your comfort back on track!
Frequently Asked Questions (FAQs)
How do I know if my AC has a bad capacitor?
You will know your AC has a bad capacitor if your outdoor unit emits a loud humming sound, but the fan or compressor won’t spin, if your system frequently turns off on its own, or if you visually inspect the device and see a bulging, swollen top or oil leaking from the canister.
Can AC run without a capacitor?
No, a central air conditioning system cannot run without a capacitor because its motors require the large, concentrated burst of stored electrical energy provided by this component to overcome physical inertia and begin spinning.
How often do AC capacitors need to be replaced?
AC capacitors typically need to be replaced every 5 to 20 years, depending on the quality of the component, how hard your system works during the summer, and whether the outdoor unit is routinely exposed to extreme heat and power surges.
Why does an AC need a capacitor?
An AC needs a capacitor because residential electrical lines do not supply enough initial starting torque to power up the large, heavy compressor and condenser fan motors from a complete standstill.
Can I change my AC capacitor myself?
No, you should not change an AC capacitor yourself because these devices store lethal amounts of high-voltage electricity even after your home’s main circuit breakers are turned off, making professional tools and safety training necessary.
Can you run AC with a bad capacitor?
No, you cannot run an AC with a bad capacitor because forcing the system to run with a failed electrical starter will cause the motors to overheat rapidly, burn out their internal wiring, and lead to an expensive compressor failure.